Are you ready to take your roofing skills to the next level? Installing a puff sheet roof may seem like a daunting task, but with the right knowledge and guidance, you can achieve professional results. In this step-by-step guide, we will walk you through the process of installing a puff sheet roof like a pro. From gathering the necessary tools and materials to measuring and cutting the sheets, we will provide you with all the essential information you need to ensure a seamless installation.
Whether you are a seasoned DIY enthusiast or a beginner looking to tackle your first roofing project, this guide will equip you with the skills and confidence to tackle the job with ease. Get ready to elevate your roofing game and create a beautiful, durable roof that will stand the test of time. Let’s dive in and get started on transforming your home with a professionally installed puff sheet roof.
Advantages of using puff sheet roofing
Puff sheet roofing offers a range of advantages that make it an attractive option for homeowners. Firstly, puff sheets are lightweight, making them easier to handle and install compared to other roofing materials. This not only reduces the installation time but also minimizes the strain on the roof structure. Additionally, puff sheets are known for their durability and resistance to harsh weather conditions, such as heavy rain, strong winds, and extreme temperatures. This means that once installed, your puff sheet roof will require minimal maintenance and repairs, saving you time and money in the long run. Furthermore, puff sheet roofing is highly versatile and can be used on a variety of roof types, including flat roofs, pitched roofs, and curved roofs. This makes it a flexible choice that can be adapted to suit your specific roofing needs.
In terms of aesthetics, puff sheet roofing offers a sleek and modern look that can enhance the overall appearance of your home. The smooth surface of the sheets creates a seamless finish, adding a touch of elegance to your property. Additionally, puff sheets are available in a range of colors and finishes, allowing you to choose a style that complements your home’s architectural design. Whether you prefer a traditional look or a more contemporary feel, puff sheet roofing can be customized to suit your personal taste. Lastly, puff sheet roofing is an environmentally friendly option, as the sheets are often made from recycled materials. By choosing to install a puff sheet roof, you are contributing to the sustainable and responsible use of resources.
Overall, the advantages of puff sheet roofing make it a popular choice for homeowners who are looking for a cost-effective, durable, and visually appealing roofing solution. Now that we have explored the benefits, let’s move on to the practical aspects of installing a puff sheet roof.
Materials and tools needed for installing a puff sheet roof
Before you begin the installation process, it is important to gather all the necessary materials and tools. This will ensure that you have everything you need within reach, minimizing disruptions and saving you time. Here is a list of the materials and tools you will need for installing a puff sheet roof:
Materials:
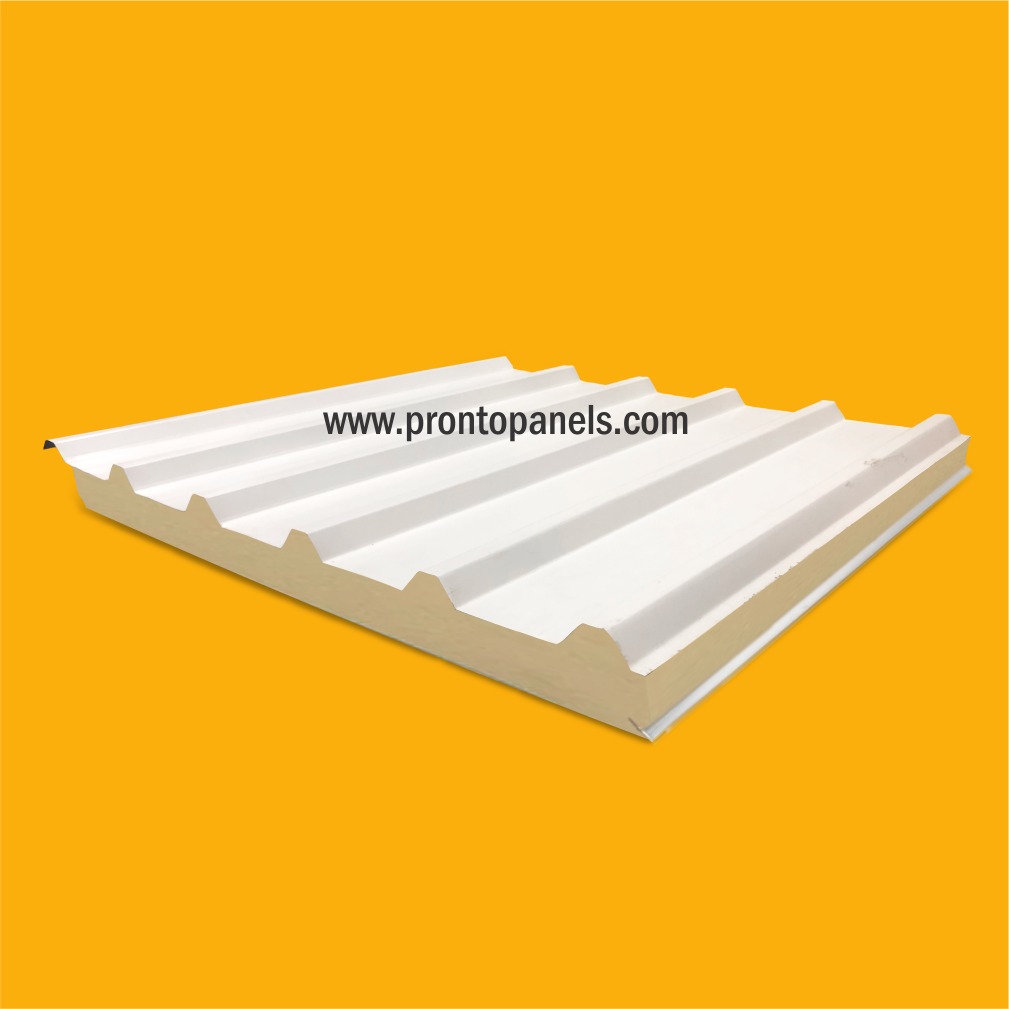
Puff sheets:
Measure the dimensions of your roof and purchase enough puff sheets to cover the entire area. It is recommended to buy extra sheets to account for any errors or future replacements. We recommend reliable manufacturer in India like Pronto Panels for good quality puff roofing sheets.
Roofing underlayment:
This is a protective layer that is installed beneath the puff sheets to provide additional insulation and weatherproofing.
Screws and fasteners:
Use corrosion-resistant screws and fasteners to secure the puff sheets to the roof structure.
Flashings and trim:
These components are used to seal the joints, edges, and corners of the puff sheets, ensuring a watertight and aesthetically pleasing finish.
Sealant:
Choose a high-quality sealant that is compatible with the puff sheets and can withstand extreme weather conditions.
Tools:
Measuring tape:
Use a measuring tape to accurately measure the dimensions of your roof and the puff sheets.
Utility knife:
A sharp utility knife will be needed for cutting the puff sheets to the required size.
Screwdriver or drill:
Use a screwdriver or a drill with the appropriate bit to insert the screws and fasteners.
Ladder or scaffolding:
Depending on the height of your roof, you will need a ladder or scaffolding to access the installation area safely.
Safety equipment:
It is essential to wear safety gear, such as gloves, goggles, and a hard hat, to protect yourself during the installation process.
Now that you have gathered all the necessary materials and tools, let’s move on to preparing the roof for installation.
Preparing the roof for installation
Before you can begin installing the puff sheets, it is important to prepare the roof to ensure a smooth and successful installation. Follow these steps to prepare your roof for the installation process:
1. Clean the roof surface:
Start by removing any debris, dirt, or loose materials from the roof surface. Use a broom or a leaf blower to clear the area and ensure that the surface is clean and free from any obstacles.
2. Inspect for damage:
Carefully inspect the roof surface for any signs of damage, such as cracks, leaks, or rotting. It is crucial to address any existing issues before installing the puff sheets to prevent further damage and ensure the longevity of your roof.
3. Repair and reinforce:
If you come across any damaged areas, make the necessary repairs and reinforcements. Replace any damaged or rotten sections and reinforce the roof structure if needed. This will provide a solid foundation for the puff sheet installation and ensure the structural integrity of your roof.
4. Install the underlayment:
Once the roof surface is clean and in good condition, it is time to install the roofing underlayment. Roll out the underlayment over the entire roof area, ensuring that it overlaps at the seams. Secure the underlayment in place using roofing nails or staples, making sure it is taut and wrinkle-free.
By following these preparation steps, you are setting the stage for a successful puff sheet roof installation. Now that the roof is ready, let’s move on to measuring and cutting the puff sheets.
Measuring and cutting the puff sheets
Accurate measurements and precise cutting are essential for a seamless and professional-looking puff sheet roof installation. Follow these steps to measure and cut the puff sheets:
1. Measure the roof:
Start by measuring the dimensions of your roof to determine the size of the puff sheets you will need. Measure both the length and width of the roof, and take into account any overhangs or angles.
2. Transfer the measurements:
Using a measuring tape, transfer the measurements onto the puff sheets. Ensure that the sheets are positioned correctly and align with the roof edges.
3. Mark the cutting lines:
Once the measurements are transferred, use a straight edge or a chalk line to mark the cutting lines on the puff sheets. Double-check the measurements and ensure that the lines are straight and accurate.
4. Cut the puff sheets:
Using a sharp utility knife, carefully cut along the marked lines to create the individual puff sheets. Apply even pressure and make smooth, continuous cuts to achieve clean and precise edges.
Remember to take your time during the measuring and cutting process, as accuracy is key to achieving a professional finish. Once the puff sheets are cut, it’s time to move on to the installation process.
Installing the puff sheets on the roof
Now that you have prepared the roof and cut the puff sheets to the required size, it is time to start installing them. Follow these steps for a successful puff sheet installation:
1. Start at one end:
Begin by placing the first puff sheet at one end of the roof, ensuring that it is aligned with the roof edges and overhangs. Leave a small gap between the sheet and the roof edge to allow for expansion and contraction.
2. Fasten the sheet:
Use screws or fasteners to secure the puff sheet to the roof structure. Start at the corners and work your way towards the center, spacing the screws or fasteners evenly along the edges. Make sure the sheet is flat and wrinkle-free as you secure it in place.
3. Overlap the sheets:
For the subsequent puff sheets, overlap them with the previously installed sheet by a few inches. This overlap will ensure a watertight seal and prevent any water infiltration. Secure the overlapping section with screws or fasteners, making sure it is tightly sealed.
4. Continue the installation:
Repeat the process of placing, fastening, and overlapping the puff sheets until you reach the other end of the roof. Take your time to ensure each sheet is properly installed and aligned with the previous ones.
By following these installation steps, you will be able to install the puff sheets in a systematic and efficient manner. Once the sheets are in place, it’s time to secure them further and ensure a watertight seal.
Securing the puff sheets with screws and fasteners
To ensure the stability and longevity of your puff sheet roof, it is important to secure the sheets with screws and fasteners. Follow these steps to secure the puff sheets:
1. Choose the right screws and fasteners:
Select screws and fasteners that are specifically designed for puff sheet roofing. These should be corrosion-resistant and have a low-profile head to prevent water pooling and leaks.
2. Insert the screws and fasteners:
Starting at one corner of the puff sheet, insert the screws or fasteners at regular intervals along the edges. Make sure to apply even pressure and avoid over-tightening, as this may damage the sheets or compromise the seal.
3. Check for tightness:
After securing the screws or fasteners, check that they are tight and properly seated. Use a screwdriver or a drill with the appropriate bit to tighten any loose screws or fasteners.
By properly securing the puff sheets, you are ensuring their stability and resistance to external forces. However, to achieve a completely watertight roof, it is important to seal the joints and edges of the puff sheets.
Sealing the joints and edges of the puff sheets
To prevent water infiltration and ensure a watertight seal, it is crucial to seal the joints and edges of the puff sheets. Follow these steps to seal the puff sheet roof:
1. Apply sealant to joints:
Using a high-quality sealant, apply a generous bead along the joints where the puff sheets overlap. This will create a watertight seal and prevent any water from seeping through the gaps.
2. Seal the edges:
Apply sealant along the edges of the puff sheets, where they meet the roof edges or flashings. This will further enhance the watertight seal and protect against potential leaks.
3. Smooth the sealant:
Use a putty knife or a caulking tool to smooth the applied sealant, ensuring a neat and professional finish. Remove any excess sealant and wipe the surface clean.
By sealing the joints and edges of the puff sheets, you are adding an extra layer of protection to your roof and minimizing the risk of water damage. However, to complete the installation and achieve a polished look, it is important to add flashings and trim.
Adding flashings and trim to complete the installation
Flashings and trim are essential components that provide additional protection and enhance the visual appeal of your puff sheet roof. Follow these steps to add flashings and trim:
1. Choose the right flashings and trim:
Select flashings and trim that are compatible with puff sheet roofing and complement your chosen style. Flashings are used to seal the joints, edges, and corners of the puff sheets, while trim adds a finishing touch to the roof’s appearance.
2. Install the flashings:
Starting with the corners, apply the flashings over the joints and edges of the puff sheets. Secure them in place using screws or nails, ensuring a tight and secure fit. Repeat this process for all joints and edges that require flashings.
3. Add trim:
Once the flashings are installed, it’s time to add trim to the roof’s edges and corners. Trim not only provides a clean and polished look but also helps protect the puff sheets from potential damage. Secure the trim in place using screws or nails, making sure it is evenly spaced and aligned.
By adding flashings and trim, you are completing the installation and adding the final touches to your puff sheet roof. Now that the installation is complete, let’s move on to some maintenance tips to ensure the longevity of your roof.
Maintenance tips for a puff sheet roof
To keep your puff sheet roof in optimal condition and extend its lifespan, regular maintenance is essential. Here are some maintenance tips to follow:
1. Regular inspections:
Conduct regular inspections of your puff sheet roof to identify any signs of damage, such as loose screws, cracked sheets, or damaged flashings. Address any issues promptly to prevent further damage and ensure the longevity of your roof.
2. Remove debris:
Regularly remove any debris, leaves, or branches that may accumulate on the roof surface. This will prevent water pooling and potential damage.
3. Clean the roof:
Use a soft brush or a low-pressure hose to clean the puff sheets and remove any dirt or stains. Avoid using abrasive materials or high-pressure washers, as these may damage the sheets or compromise the seal.
4. Trim overhanging branches:
If there are any overhanging tree branches near your puff sheet roof, trim them regularly to prevent damage from falling branches or excessive shade that can lead to moss or algae growth.
5. Check for leaks:
After heavy rainfall or severe weather conditions, check for any signs of leaks or water infiltration. Address any leaks immediately to prevent further damage to your roof and the underlying structure.
By following these maintenance tips, you can ensure the longevity and performance of your puff sheet roof for years to come.
Conclusion
Installing a puff sheet roof may seem like a complex task, but with the right knowledge and guidance, you can achieve professional results. In this step-by-step guide, we have covered everything you need to know to install a puff sheet roof like a pro. From gathering the necessary tools and materials to measuring and cutting the sheets, and from installing and securing the puff sheets to sealing the joints and edges, we have provided you with a comprehensive overview of the installation process.
Additionally, we have shared maintenance tips to help you keep your puff sheet roof in optimal condition and extend its lifespan. For pricing of puff roofing sheets you can check this price calculator. Whether you are a seasoned DIY enthusiast or a beginner looking to tackle your first roofing project, this guide has equipped you with the skills and confidence to transform your home with a professionally installed puff sheet roof. By following the step-by-step instructions and incorporating the maintenance tips, you will be able to create a beautiful.
You may also like
-
Red Rocks to Deep Blue: Mastering Scuba Certification in Southern Utah
-
How St George Professionals Can Reverse Desk-Related Chronic Tension
-
How Southern Utah Homeowners Choose Flooring That Withstands High Heat and Red Dust
-
How Mid-Career Professionals Can Bridge the Gap to a Comfortable Retirement
-
How Families in the Grand Strand Balance Career Demands with Senior Care