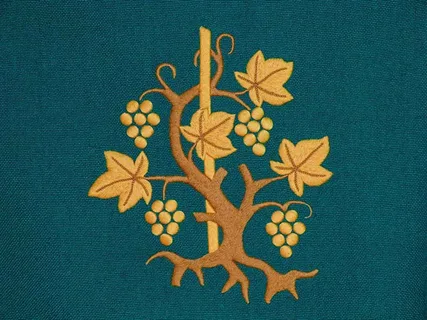
Embroidery digitizing has gained immense popularity as a means of transforming images or artwork into stunning embroidered designs. One of the crucial steps in this process involves converting a standard image file, such as JPG, into an embroidery digitizing file format like PES. In this blog post, we will explore the process of converting a JPG image to a PES file, providing you with valuable insights into the world of embroidery digitization.
Understanding Embroidery Digitizing:
Embroidery digitizing is the process of converting artwork or designs into a digital format that can be read and understood by embroidery machines. This digitized file contains specific instructions for the machine, such as stitch types, colors, and paths, enabling it to replicate the design accurately on fabric.
Choosing the Right Software:
To convert a JPG to PES file, you need specialized embroidery digitizing software. There are numerous software options available in the market, both free and paid, each with its own set of features and capabilities. Some popular software choices include Wilcom, Embrilliance, and Hatch by Wilcom. Select a software that aligns with your skill level and suits your specific requirements.
Importing the JPG Image:
Once you have the embroidery digitizing software installed, the next step is to import the JPG image you wish to convert. Most software offers an import function that allows you to browse and select the desired image file from your computer’s storage. It’s important to choose a high-quality JPG image with clear details to ensure the best possible embroidery outcome.
Image Preparation:
Before the actual conversion process begins, it’s essential to prepare the image for digitization. This typically involves resizing, cropping, and adjusting the image to the desired dimensions. Some software tools also offer options for enhancing image quality, removing backgrounds, or making other necessary modifications. Take your time to fine-tune the image according to your requirements.
Tracing and Digitizing:
The heart of the conversion process lies in the tracing and digitizing phase. Here, you will define the various elements of your design, such as outlines, shapes, and color segments. The software provides tools to manually trace the design, allowing you to create paths and assign stitch types. Alternatively, some software also offers automatic tracing capabilities that simplify the process, especially for simpler designs.
Assigning Stitch Types and Colors:
Once the design elements are defined, you need to assign stitch types and colors to each section. Stitch types include satin stitches, fill stitches, running stitches, and more, each serving a different purpose in replicating the design accurately. The choice of colors depends on personal preference or the desired outcome of the embroidery. Most software provides a color palette from which you can select and assign colors to specific design elements.
Fine-tuning and Previewing:
After assigning stitch types and colors, it’s crucial to review and fine-tune the design before finalizing the conversion. This step involves adjusting stitch densities, stitch lengths, and other parameters to achieve the desired level of detail and texture in the embroidery. Most software allows you to preview the design on a virtual embroidery canvas, giving you a realistic idea of how the final embroidered piece will look.
Saving as a PES File:
Once you are satisfied with the design, it’s time to save the digitized file in the PES format. PES is a widely supported file format that is compatible with various embroidery machines. In your software, look for the “Save” or “Export” options and choose PES as the file format. Select an appropriate file name and destination on your computer, and the software will generate the PES file ready for use.
Conclusion
Converting a JPG image to a PES file requires embroidery digitizing software and some basic understanding of the digitizing process. By following the step-by-step guide outlined in this blog, you can successfully convert your digital images into embroidery designs suitable for Brother sewing and embroidery machines. Remember, practice makes perfect, and don’t hesitate to explore additional resources and tutorials to enhance your embroidery digitizing skills. Let your creativity flourish and enjoy the art of turning pixels into beautiful stitches!
For More Blogs Visit Sohago
You may also like
-
Best Times of Year for Rain Gutter Installation in Wisconsin: What Homeowners Should Know
-
How to Create One-of-a-Kind Engagement Invites That Tell Your Story
-
Unveiling the Top Picks: The Ultimate Guide to the Best Head Shavers in 2024
-
Choosing The Right Palette Insights into Professional Painting Contracts
-
Wear Your Imagination: Customized Text and Graphics T-shirt Printing in Sharjah

