When it comes to upgrading your crossbow, adding a thermal scope can be a game-changer. It allows you to hunt in low-light conditions and gives you a significant advantage when tracking game. However, many hunters wonder if they can install a thermal scope on their crossbow themselves. In this article, we will explore the possibility of a DIY thermal scope installation on your crossbow. Before you start, it’s essential to have the right equipment and follow safety guidelines, read this blog post from Gear Guide Pro to get started.
The Right Equipment
Before attempting a DIY thermal scope installation, you need to ensure you have the right equipment at your disposal. Here’s a list of essential items you’ll need:
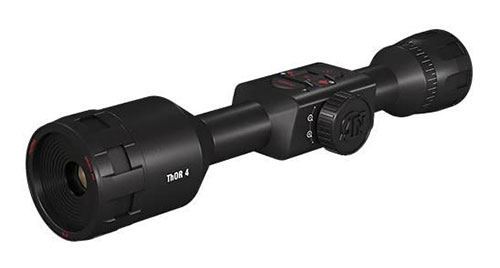
1. Thermal Scope
Invest in a quality thermal scope designed for crossbows. It should have the necessary mounting options and be compatible with your crossbow model. Read this blog post from Gear Guide Pro to find recommendations for thermal scopes suitable for crossbow hunting.
2. Mounting Hardware
You’ll need mounting hardware that matches your crossbow and thermal scope specifications. Ensure that the mounts are secure and can withstand recoil when you fire your crossbow.
3. Tools
Gather all the tools you’ll need, such as screwdrivers, Allen wrenches, and torque wrenches. Having the right tools will make the installation process more straightforward and prevent damage to your equipment.
The Installation Process
Now that you have the necessary equipment, let’s dive into the DIY thermal scope installation process:
1. Read the Manual
Start by carefully reading the user manuals for both your crossbow and thermal scope. These manuals contain important information about installation, safety precautions, and maintenance.
2. Clear Workspace
Choose a clean, well-lit workspace with plenty of room to work. Lay out all your tools and equipment to ensure you have everything you need within reach.
3. Attach the Mounts
Follow the manufacturer’s instructions to attach the mounting hardware to your crossbow. Ensure that the mounts are securely fastened and aligned correctly.
4. Mount the Thermal Scope
Carefully attach the thermal scope to the mounting hardware. Be gentle to avoid any damage. Double-check that it’s firmly in place and aligned with your crossbow.
5. Sight-In
Once the thermal scope is mounted, you’ll need to sight it in. This process ensures that your scope is accurately aligned with your crossbow’s point of impact. Follow the scope’s instructions for sighting in, and make any necessary adjustments.
6. Test and Fine-Tune
Take your crossbow to a shooting range to test the thermal scope’s accuracy. Fire a few shots at different distances to ensure it’s properly calibrated. Fine-tune the scope as needed.
Safety First
Throughout the DIY thermal scope installation process, safety should be your top priority. Always follow safety guidelines provided by the crossbow and thermal scope manufacturers. Additionally, never point your crossbow at anything you don’t intend to shoot, and keep it unloaded when not in use.
Conclusion
In conclusion, installing a thermal scope on your crossbow is indeed possible as a DIY project, but it requires careful planning, the right equipment, and adherence to safety measures.