Drawing a Bicycle is only 6 simple tasks! We all know about a bicycle, but sometimes they can be underestimated. A plan is complicated and useful, taking into account more efficient transportation, fun rides, and surprisingly super-charged stunts. You may also learn many things cartoon drawing, scary drawing, cartoon drawing, cute drawing, flowers drawing, parrot drawing cute drawing, puppy drawing, and dog drawing.
Sometimes, making one is not feasible, and knowing how to draw a bicycle may be best. It can get quite emotional, thanks to that muddled shot we referred to above, but that’s precisely why this educational exercise is dragging on. parrot drawing is the most effective method to attract a bicycle 6 steps
The most efficient way to draw a bike – we should roll everything!
Stage 1
the most efficient way to draw a bicycle Step 1 This help with the most efficient method of drawing a bicycle will begin with the handlebars of the bicycle. Draw a fitted shape for the part where the two sides of the handlebars will come out. Then you can involve some bent lines for the bars extending up. On the left, draw a small roundabout cut into the bar for a bicycle bell. Next, we will draw the handles. These can be drawn using long shapes and fit into bar finishes. Finally, expand a few small lines down from the segment that holds the handlebars, and then you’re ready for the second help stage!
Step 2: Now, start drawing the body of the bike.
the most efficient way to draw a bicycle is step 2 You have finished the handlebars, and in this second part of drawing your bike, we will start taking care of the body of the bike. First, draw a small, tight shape with an oval on the front under the end of the handlebars. It will work as a small light on the front of the bike.
This light will be connected to a small tight shape, and then two straight lines will be joined from angle to angle. Next, at this point, you will draw the bicycle seat. Arranging this will be meaningful later, so make an honest effort to position it as we did in our reference image. We will modify this step by setting additional straight limits from the seat for additional bars. Then this will be the perfect opportunity for step 3 of the help!
Step 3 – Remove the caps for the revolutions in this phase
the most efficient way to draw a bicycle Step 3 This third step of our help on the most efficient way to draw a bicycle will be related to drawing more bicycle segments. To start, use some curved lines to create delicate, tight shapes that will act as covers over the highest points of the wheels. Then there will be a further level shape over where the bike chain will be. When you get them to look like our reference image, we’ll move on to step 4.
Step 4 – Next, draw the offered
instructions to draw a bicycle Step 4 It’s almost time to start adding the final details and components to the design of this bike, but first, we have a few important things to add. It wouldn’t be a remarkable bike without some wheels, so we’re encouraged to add some now! .
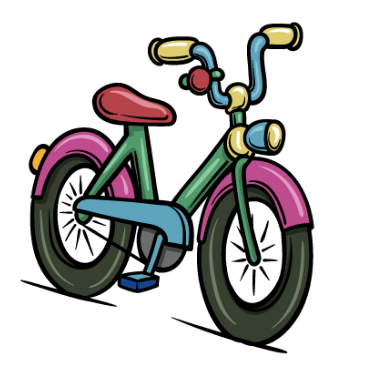
Step 5 – Add the Final Niceties to Your Bike Drawing
instructions to draw a bicycle Step 5 You have finished the design of this image, and now you can make it much more attractive by adding some final niceties and components. As shown in our reference image, we’ve added some general line subtleties throughout the image. This help to show off the metal surfaces of the bike body and, in addition
You may also like
-
Join The IATA-Certified Airline & Cabin Crew Training – Neerja School of Aviation
-
How to Become an Angel Investor: Easy Guide for Beginners
-
Which Institute Offers the Best Google Ads Course in Karachi?
-
Easy Tips for CBSE Sample Paper 2025-26 Practice
-
Top Mistakes to Avoid When Writing a Book Report in 2025