How to Draw An Ocean. Nothing beats a mesmerizing panoramic view of the sea. The ocean’s unsurpassed beauty is also why it is one of the most popular subjects in many works of art, including drawings.
Also, check our Penguin Coloring Pages.
If you are reading this, you are probably one of many people who want to learn how to draw an ocean. Luckily you are in the right place!
We’ve created a step-by-step tutorial on how to draw an ocean, summed up in 9 easy steps.
Each guide comes with illustrations to help you follow the steps with ease. With the help of this comprehensive guide, drawing an ocean will be easier and more enjoyable. It doesn’t matter if you are a beginner or an expert at drawing. You can do it!
How to Draw An Ocean
Step 1
Begin by creating the horizon, the line between the sea surface and the sky. Just draw a straight vertical line on the paper.
Remember that the line should be placed directly over the center of the paper. It should divide the sheet into two parts, with the lower space being more significant than the upper.
If you need help drawing a perfectly straight line, use a ruler. This allows you to draw a straight line flawlessly and effortlessly.
Step 2
Draw a semicircle above the horizon, the vertical line we drew earlier. This outlines the sun as it rises or sets, whichever you prefer.
Make sure the sun is drawn in the middle of the horizon to make your drawing aesthetically pleasing.
Step 3
Create a place for the sand by drawing a wavy line across the bottom of the paper. This separates the sand from the ocean.
After completing this step, the beach should now be visible.
Step 4
Create an illusion of depth by adding patterns to the sea’s surface. Draw continuous curved or wavy lines on the ocean’s edge near the shore.
Don’t worry if the line isn’t perfectly curled. The more irregular this line is, the more natural the sea waves appear.
Step 5
Draw a straight horizontal line going from the left edge of the sky to the right.
It then makes a slight curve and returns to the road in the right direction.
After passing the sun, go over a roundabout and extend the line back to the left.
If you follow the steps correctly, this should form an irregular shape with curves in the sky.
Step 6
Draw another line across the sky following the outline of the line we drew in the previous step.
This line should be directly above the previous one, emerging from the left side edge and extending to the opposite side.
Step 7
Adding marine detail and patterns is essential to adding textures that make it appear dimensional and lifelike.
Draw several short horizontal lines at different points on the sea surface. Ensure the lines vary in length; Some are a quarter of an inch long, while others are even shorter.
Don’t press too hard with the pencil when drawing these lines. Draw light strokes with a gentle hand to avoid hard, thick lines.
Step 8
To add texture and make the sand look realistic, draw several small dots of different sizes scattered across the surface of the sand.
Don’t forget to shade the small dots and make them appear pitch black.
Step 9
Draw many irregular circular shapes on the ocean’s edge near the shore. This creates the appearance of bubbles and creates an illusion of realistic sea waves.
Bubbles, as shown in the figure, differ in shape and size.
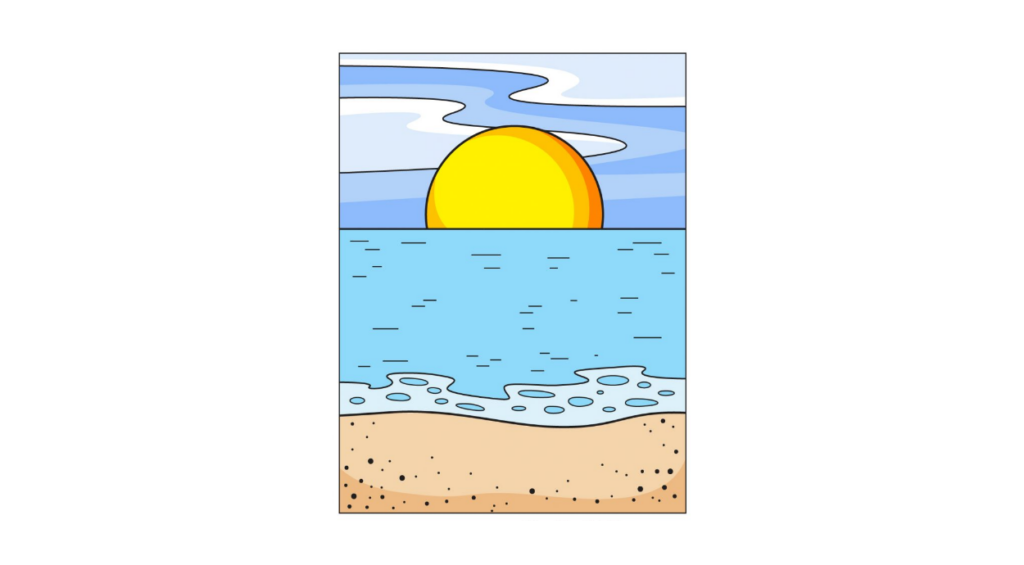
As you can see, the ocean has finally come together! Now all that’s missing is a touch of color to bring your artwork to life. Now that we’re drawn an ocean, let’s move on to the final and most fun step. Prepare your favorite coloring materials because now we will color your ocean drawing!
In the illustration, you can see that we used the blue color for the ocean and the white color for the ocean’s edge. Next, we used light brown to color the sand.
To create a bright, sunny day, we used a bright yellow for the sun and a combination of a deeper shade of blue, light blue, and white for the sky. You can use our illustration as a guide to color your drawing or choose a unique color set. It all depends on you! Whatever you choose, we’re sure your drawing will turn out great! We can’t wait to see what colors you’ll use.
Your Ocean Drawing is Finished!
You may also like
-
Join The IATA-Certified Airline & Cabin Crew Training – Neerja School of Aviation
-
How to Become an Angel Investor: Easy Guide for Beginners
-
Which Institute Offers the Best Google Ads Course in Karachi?
-
Easy Tips for CBSE Sample Paper 2025-26 Practice
-
Top Mistakes to Avoid When Writing a Book Report in 2025