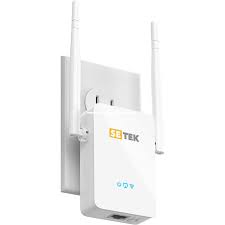
Getting troubled by the WiFi dead zones in your home? Setting up a Setek WiFi range extender can be helpful. One of the best extenders available in the market is the Setek extender. The initial setup of this extender is very simple. Even then users get stuck. In case you are trying to complete the Setek WiFi extender setup but are failing to execute it then this guide will be helpful. Here we have penned down the topmost tips that will help you get rid of any issue that is stopping you from setting up your Setek extender.
How to Fix Setek WiFi Extender Setup Issues?
Step 1: Reboot the Extender
First of all, reboot your extender in case you are not able to complete the setup process. Perhaps there are some minor technical glitches that are stopping you from doing the task at hand. To get them eliminated, rebooting is the best option. Thus power off the extender and then wait for some time before powering it on.
Step 2: Power Cycle the Network
In case the previous step did not help you fix the issue then you need to power cycle the entire network. Here you need to power off the router as well. Thus disconnect the router and the Setek extender first. After that, power off the rouer and the extender. Wait for 5 minutes minimum. Connect the devices once again. Next turn on the router and then the extender. Try to set up your extender now.
Step 3: Check Wiring
Have a good look at all the cables and wires connected to the Setek extender. Faulty cables are one of the main reasons that prevent the setup process.
Check the Ethernet cable that is used to connect the extender to the router. If it is damaged then replace it now. Also, make sure that it is making a solid connection between the two devices.
After that we want you to have a look at the power cables that you have used to apply power to the router and the extender. It should neither be loose nor damaged. Make sure that the extender is receiving a consistent power supply so as to not fall victim to setup issues.
Step 4: Access the Correct Network
Are you sure the computer or laptop that you are using to set up the extender is connected to the right network? Perhaps this is the reason why you are getting setup issues.
We recommend you connect your computer to the Setek extender’s WiFi before setting it up. If you fail to connect the PC to the extender’s PC then you have the option of connecting them using an Ethernet cable.
Step 5: Reset the Extender
Finally when no other hack works for you to do away with the setup issues, then reset your extender once. This step will definitely be helpful. To reset the extender use the instructions given below:
- Firstly remove the connection between the Setek wireless range extender and the host router. This is essential.
- Next, locate the Reset hole on your extender. Ensure that the extender is turned on while you are resetting it.
- Upon finding the Reset hole, press it gently using a paper clip.
- Your extender is now reset and is running on the default values.
Step 6: Use Correct Step Instructions
Once you have reset your extender, you can again try setting it up. The main motive why you had to reset your extender is that while setting up the extender it is essential that it runs on the default values. Now that it is reset, you can go for setting it up without any issues. Make very certain that you are using the correct instructions to set up the device. Use the default IP address 192.168.10.1 to log in and then follow the on-screen prompts that appear on the screen.
The Closing Note
With the hope of being helpful to you in fixing the Setek extender setup issues, we put an end to this troubleshooting guide. When you have completed the setup process, you can move the extender to a place where you experience dead zones and enjoy internet access.